Getting a new perfect TV just to find out that it won’t fit on your stand? Or does your living room just simply lack that central attention yet you can’t find anything on the market to your liking?
If you have some time and can spare some minimal budget, then yes building one yourself would be a better option. A DIY project such as a large TV stand or entertainment center that can hold a fireplace might sound too complicated; but once break down, with plans and strategy steps, would be doable at a good price and fully customizable too.
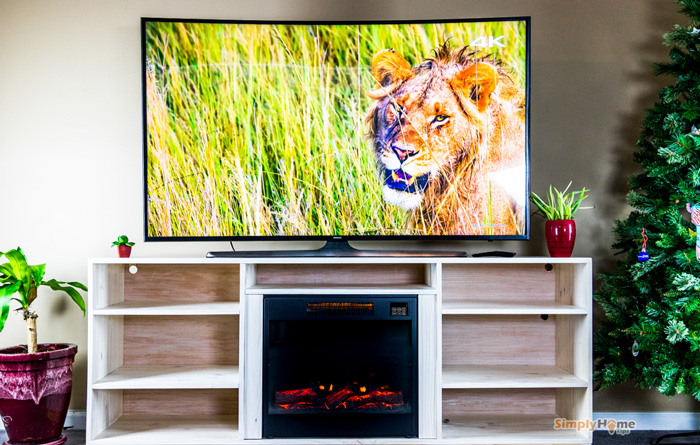
This is my scenario when I got a 65″ TV yet no stand to match that at my budget capability. Luckily, my local Menards & Lowes seem to carry lots of sales this season & similar on raw wood, pre-painted shelves… So I think to myself, why not just built one myself, then paint it to match our living theme too. While at that, let’s add a space for a prefabricated fireplace too. So that’s how the plan came out.
Sizes
So once the idea is set, it’s time to analyze and plan out material, design, and components. This is not that hard, believe me, all your needs are few boards of pre-finish pine wood/board. I chose these boards with 3/4-in for thickness and 16-in for width.
To save on the cutting time, pick the board/shelf with the exact length you want for top and bottom sides (6-feet or 72-in). Why 72 in? This is to have a little bit of space extra on both sides, if your TV standing directly on it, plus that’s what my living area allows. For future proof and/or to accommodate your space, adjust this number to the closest available pre-made board. Take a look at the most popular TV stands size chart here:
The height should be around 22 to 28 inches. My choice is 25.5 inches, why? Because wood boards often come with 8′ (96″) length. That means I can cut each board into 4 pieces of 24″ without wasting any wood. The stand top and bottom shelves are 0.75″ thickness, so the overall height will be approximately 25.5″.
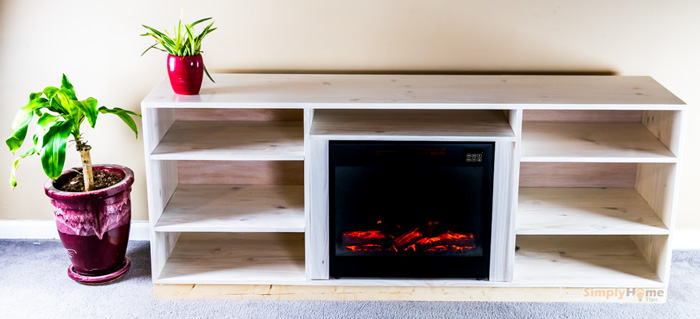
Each board’s width is approximately 16 inches, which is enough to encase most TVs out there.
Now to cut these boards, you will need a circular saw. Another tool you will need is a pocket hole jig and 1-1/4″ pocket screws. I would add some extra glue to make the joinery stronger, but that is a source of a permanent thing, so your choice on the glue there.
Fireplace Insert
We live in a cold winter area. Therefore, a fireplace insert is not only made our stand look grand but also provides the perfect warmth and coziness whenever in use. You could go online to search for some popular fireplace inserts. Be sure to look at the exact mounting size, so that you can plan these numbers into your TV stand’s plan.
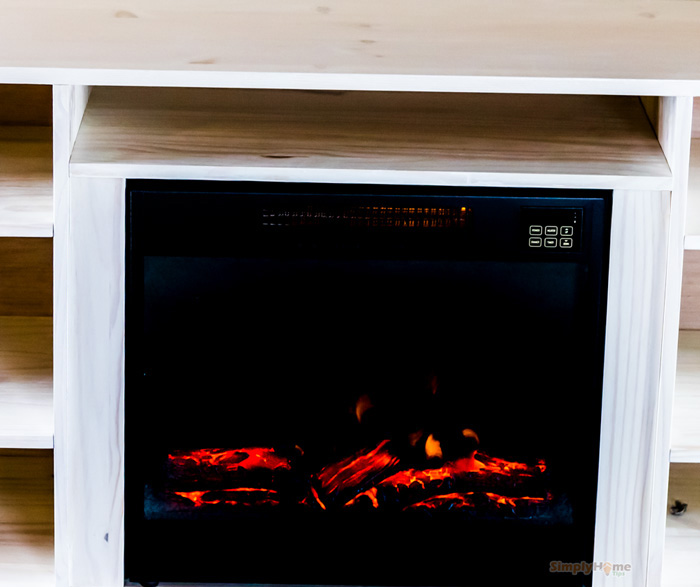
Our TV stand was originally designed perfectly fit with a standard 28.5-in fireplace insert. However, I got a deal on a 22″ backlit fireplace not long after cutting all the boards; thus, I have to add 2 extra wood planks to cover the left and right sides of the fireplace while also acting as a hood mantle. In the future, if our fireplace needed to be changed or upgrade, these planks can be removed to fit.
Coloring
Another note is on the color choice. Even with the pre-finish board, you can stain or paint them with any color. Depend on how dark or light the color you want, pick the closest range base color board.
With this project, my color choice is whitewash to match our light grayling zone. So I pick the natural light board from the local craft store. Then I would have bought a couple of gallons of paint, enough to cover 2-3 coats of color on all surfaces. Just note that these wood absorb paint a lot, so make sure to keep color code in case you need extra. For the finish, plan for 2-3 coats of topcoat/sealer or 4-5 coats if you’re doing glossy finish surfaces.
So enough of all the fore-wording, here are all the details steps-by-steps with plan sketches of my TV stand. Again, all the sizes & numbers are relative to my design and need to be changed to accommodate your need.
Guide on DIY TV stand with mid fireplace insert
1. Plan and sketch
Don’t worry, it’s simple, just grab a pencil and sketch out your TV stand. Or for computer geeks out there, go ahead and make do with Sketchup, Words, or even Photoshop. Here are what mine look like:
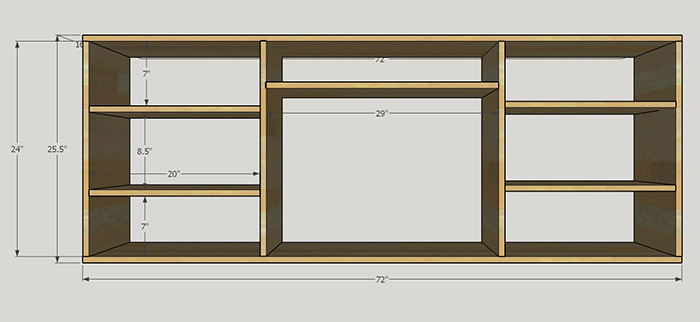
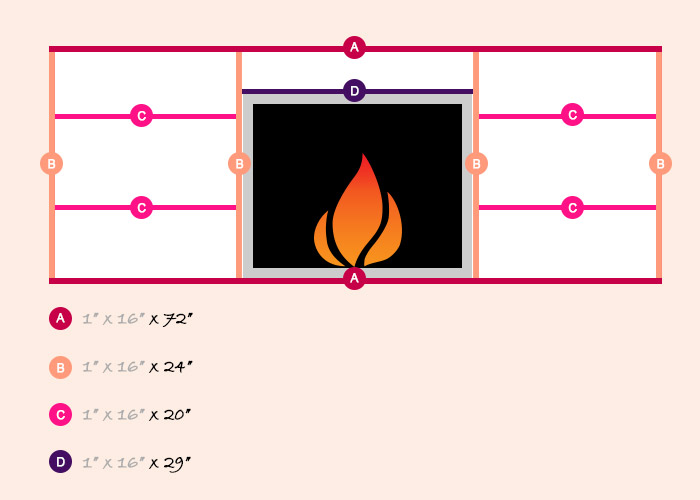
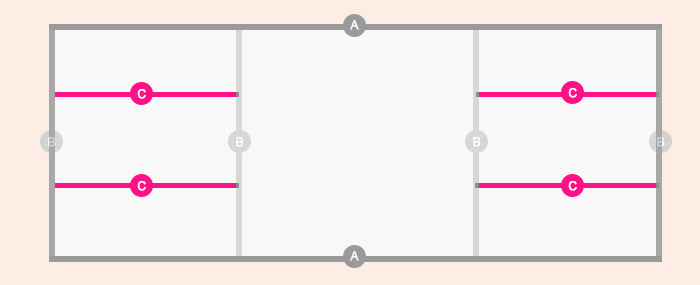
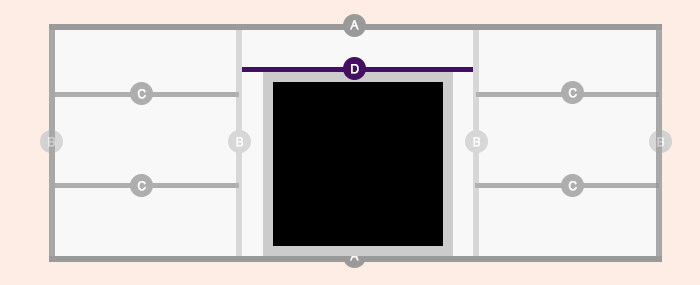
As you can see from the sketch, the stand is making from several different length wood planks as labels A, B, C, and D with their respective exact dimensions. From there, we can sum up the total wood material needed.
Material
- 2 boards: 1″ x 16″ x 72″ (A)
- 2 boards: 1″ x 16″ x 96″ (B & C)
- 1 boards: 1″ x 16″ x 36″ (D)
- 1-1/4″ pocket hole screws
- A fireplace insert (up to 29″ width and 24″ height )
- Wood glue, filler
- Wood stain/paint any colors of your choices
- Sealer or wood top coat in any finish
Tools:
- Circular Saw
- Speed square
- Clamps
- Measure tape
- Pencil
- Pocket hole jig
- Sander or sand paper (200-grit)
- Gloves
- Towels
2. Measuring & cut
Using a circular or table saw to make precise straight cut on pine boards by following the dimensions from your sketch:
- 2x 72″ A-boards: No need to cut, just label as these will be the top and bottom surface of the stand.
- 1x 96″ B-board: cut into 4 pieces of 24-inch long planks
- 1x 96″ C-board: cut into 4 pieces of 20-inch long
- 1x 36″ D-board: cut out one piece of 29-inch long
Use a pencil to label these cutout planks for clarification purposes, also mark out the sides (upper, lower, inward, outward surfaces). Choose the less good-looking sides to be your lower and inward (hence hidden/less visible) surfaces.
3. Drill pocket holes
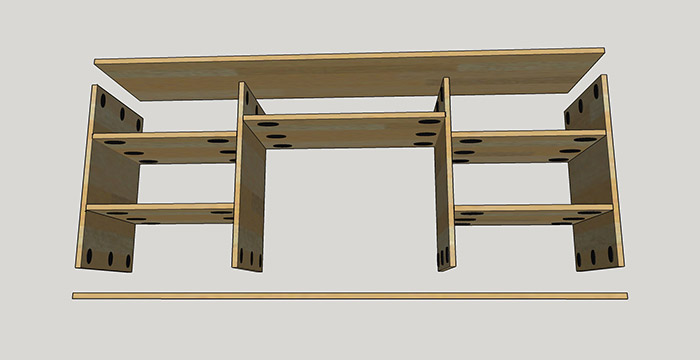
For each B, C, D planks, drill 3 pockets holes on each of their hidden surfaces as shown in the picture below (i.e. 6 holes total for each plank).
4. Sanding
Sand all the planks with a 200-grit sanding paper. This job will be much easier if you have an orbital sander, otherwise, just make do and be patient.
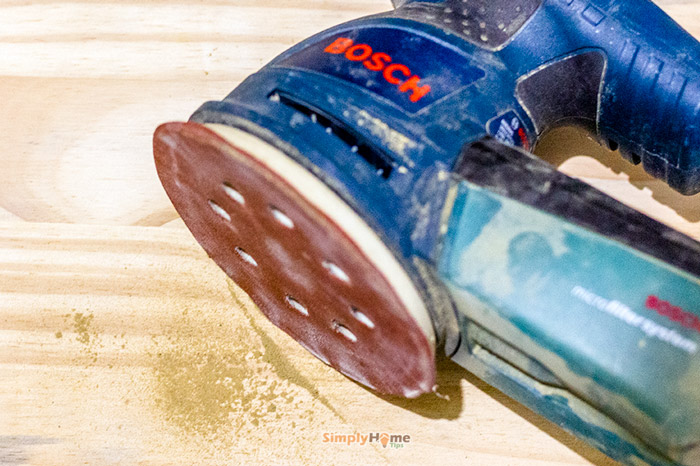
Clean with a wet towel afterward.
Tips: Sand 2-3 times on each of the plank’s edge to smooth. Do this if you don’t like sharp edges.
5. Stain or paint
Depend on your preference, you can either paint/stain all wood planks before assembling them together to have an even look inside-out front-n-back. For others who can tolerate somewhat, can go ahead and skip to the next step, then painting the TV stand as a whole.
If you choose to paint/stain them as separate planks first, make sure to cut out small pieces of masking tape to cover each and every mark or holes. These small masking tapes can be removed after the paint completely dried to reveal what needs. After the final steps, you can simply touch up these with a small amount of paint if need.
Whether you choose to paint before or after connecting the shelves, always make sure all the paint is dried and fully set before proceeding. Read the label carefully and allow extra time depending on your work zone temperature.
5. Assembling
- Measure the spaces between B boards and mark them on A boards. Add wood glue and clamp A to B boards. Secure with pocket screws.
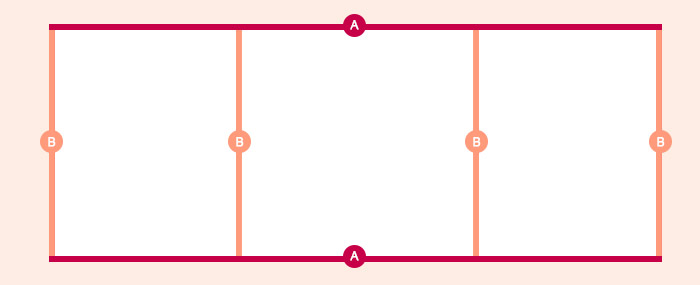
- Measure and connect C boards to make the shelves.
- Base on your fireplace height, attach D board, and secure.
5. Cover pocket holes
Using wood filler to cover every pocket hole, let them dry, and sand them smooth.
For more methods to cover pocket holes. Check out this guide.
7. Installing the fireplace
After the stand is finished, now it’s time to install the fireplace. Carefully arranging it into the insert, watch for power connecting, and everything then secures with screws.
8. TV stand base? – optional
In many cases, your project is finished right after the previous steps, which is assembling, cover holes, and install the fireplace. For others like us, who have thicker carpet and don’t like the sinking in feeling or whatsoever reason, then extra steps are needed for a simple base so that our TV stand can sit upon.
Below is a sketch of our simple base, which is rectangular with three divided sections.

For this base, all your needs are 3 – 2 x 4 x 8-ft Framing studs cut according to the size listed above. You can then mark and paint/stain to match the color of your TV stand or the surround baseboard/floor molding, your choice really.
Then follow the steps as you would for a TV stand to join these stud planks. Afterward, your TV stand should be sitting nicely on top.
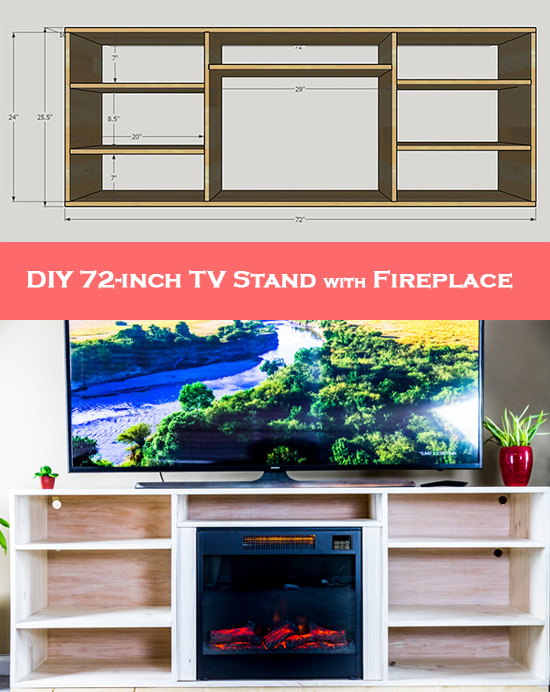
That’s all. Now, just place your TV onto it and add some decoration to make it grand.
i need plans for a 65 inch tv
Hi, this one should work well for a 65-inch TV.
Would this work for 75 inch tv as well?
Yes, It should work perfectly for a 75″ TV as well.