Have you heard of pocket hole-jig ever before? It is one of the super cool tools which you are going to use in case you’re a woodworker and love woodworking – even if you’re a newbie woodworker! Not to mention, if you are like me, then you probably require it to spell out for you, therefore, I’m heading to begin with what is a pocket hole-jig exactly so that you can have an exact idea.
What Is Pocket Hole Jig?
A pocket hole-jig is a tool for woodworking used for joining separate parts of wood through drilling “holes” at 15-degree position. A “self-tapping screw” can then be used to keep the 2 pieces together.
The pocket hole-jigs are the most important product in every carpentry or woodworking workshop. Aesthetics are pretty important particularly in furniture assembly and fine woodworking. Therefore, this is advised to have the pocket hole-jig just like you might not be lacking a miter gauge or miter sled.

An instance of the simple projects is that the pocket hole-jig is very helpful and making the face-frame joints on the drawers, cabinets, fastening photo frames and a lot more.
This technique is well-known with pro furniture manufacturers since it enables the carpenter easily to conceal any noticeable screws. This leads to the ideal front-face joints on any kind of furniture, project or otherwise.
The Best Way To Use Pocket Hole-Jig- New User’s Guide
Therefore, you have the pocket hole-jig in front of you and only ready to drill down the primary hidden hole in the woodwork. In case you’re wondering and don’t know how you can make use of a pocket hole-jig, then I assure you that this particular post is unquestionably for you. Now, let’s learn how to use pocket hole-jig.
1. Study The Pocket Hole-Jig
Before you begin to utilize any specific tool, the initial thing you have to do is to be familiar with the tool. Whether it is a tool run electrically or handy tool simply; you have to understand how it functions before you begin working with this.
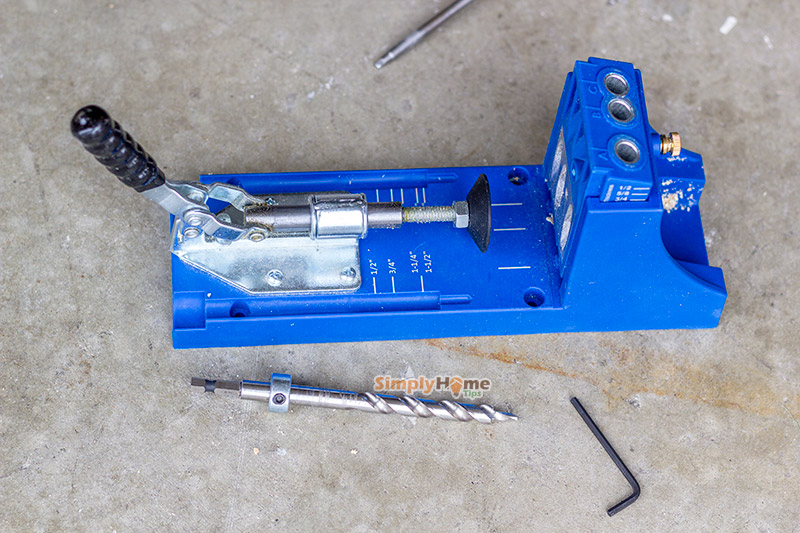
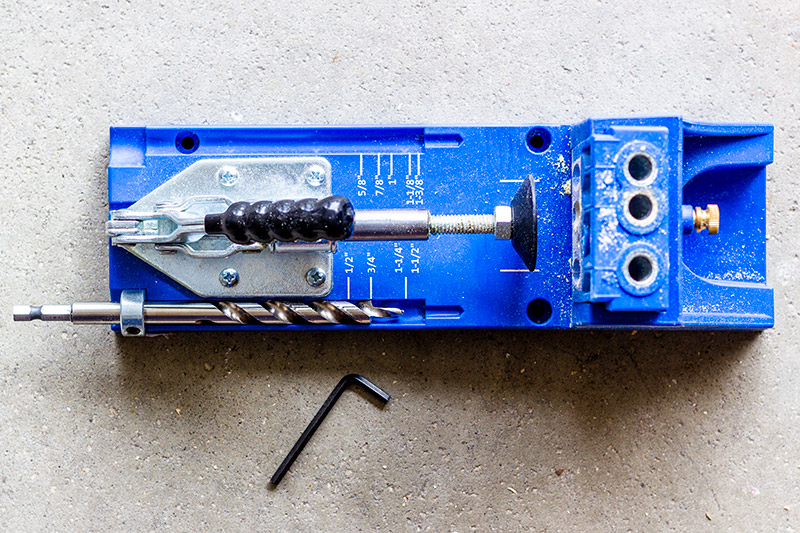
You can take a look at the manual inside the package to get a detailed explanation of each portion of the pocket hole-jig. The pocket hole-jig has primarily two major parts; drill bit and jig.
Usually, the pocket hole-jigs also consist of a “square tipped” driver to help you drilling the “Kreg Jig Screws“ perfectly. You will get a simple to adjust “stop collar” on bit to place the precise distance you want to drill.
2. Calculate Your Thickness
The next thing you have to perform is to calculate the width of piece which you need to drill. This is always a good idea to calculate the thickness manually apart from pondering what this is tagged on the box. It occurs so frequently that the wood tends to reduce in size from its exact width.
3. Adjust Depth Collar
Whenever you are finished with the measurement, this is the perfect time for setting the “depth collar” exactly to drill the depth you’d like. Simply, place the bit in the scale “marked groove” on body of the jig and then adjust the “stop collar” consequently. While you set this right, bit is going to drill the holes to exact depth which you set just.


4. Adjust The Jig Placement
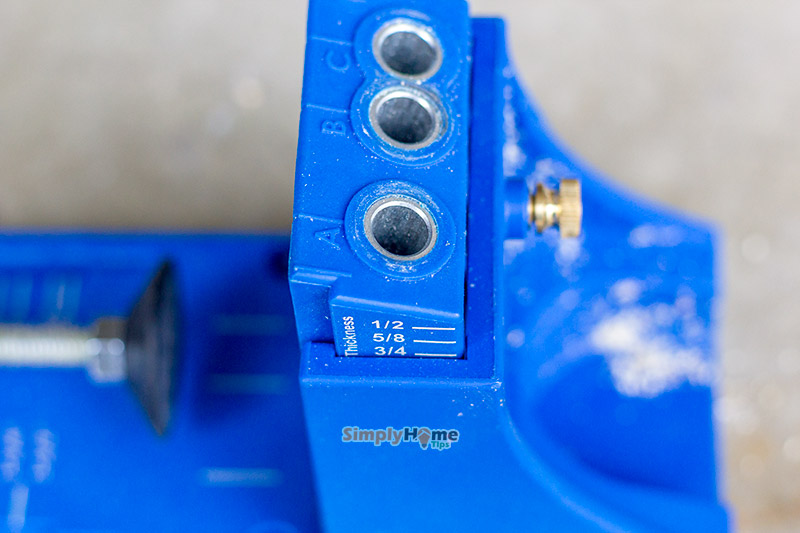
At this point, check out the jig. You now have to adjust the jig placement. You will find a “measurement scale” on the edge of jig as well, correct? You have to put the placement of jig as outlined by the thickness of the piece which you need to drill down.

You will see a “gold thumbscrew” behind the jig. Release the screw as well as adjust the position accordingly. Ultimately, tighten the “gold thumbscrew” to avoid misplace while drilling the holes.
5. Attach The Wood And Start Drilling
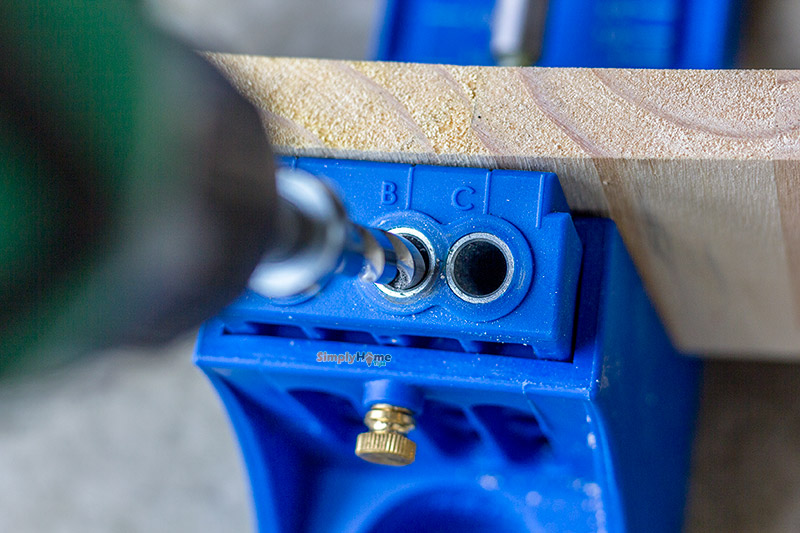
At present, you need to attach the “wood board” on the jig and then start drilling the holes. Don’t miss to clamp the “jig” to the workbench for keeping it stable while drilling the holes.
Right now, put the piece of the wood and push clamp lever ahead. Adjust clamp lever as well as tighten up the screw for securing the item of wood on jig.

Last but not least, enter the bit in the “pocket holes” of jig and then begin drilling in forward motion. Continue drilling till the “stop collar socket” fixed on bit achieves the entrance of pocket holes and finally, there you go. Don’t miss to drill around 2 holes for the stronger joints.

This post is intended to help you learn how to use a pocket hole-jig in an effective manner and I hope that you’ve got the point. Make sure you read this post and cross-check all the details mentioned in this post before you move to start the work. Thanks for reading this post. Share this post with your friends on social media so that they can be benefited also.
Leave a Reply