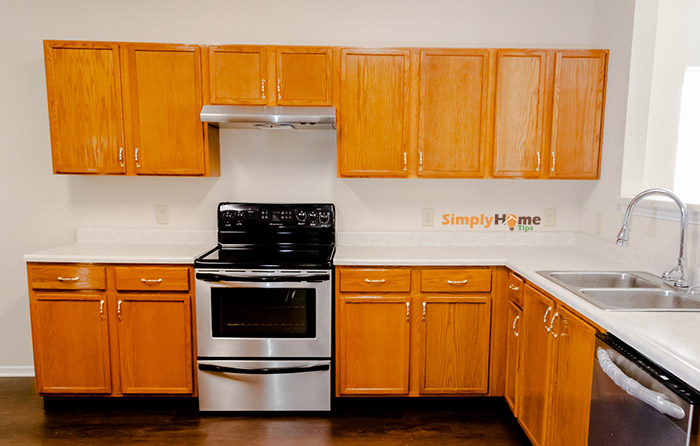
Once you picked out the best color to transform your cabinet into something new and amazing, it’s time to dive into the works and. Note that this is a DIY project that would require lots of time dedication, waiting, and your best attention to detail.

Following is the list of all tools and supplies in general which items marked (*) as optional or per situation basic. Please wage and substitute out for your specific situation and preferences.
The big Tools & Supplies List for Painting Cabinets
- Cabinet Paint of choice
- Stain-blocking Primer (recommended for better cover and adhesive)
- Paint Additives like oil bond, glaze, hard coat… (*)
- Sanding blocks/papers in coarse 100-120 grit and fine 320-400 grit
- No-sanding liquid or de-glosser (* for no-sand method)
- TSP based cleaning solution
- Scrubber or scouring pads
- 2-inch angle brush(es)
- High-density mini foam roller + tray + handle OR Paint Sprayer (*)
- Wood filler, spackling compound, or painter putty (depend on your cabinet base)
- Putty knife
- Scraper or old credit card
- Woodgrain filler (* for removing oak grains and smoother finish)
- Power tools – screwdrivers
- Masking tapes/Painter tapes
- Frog tape/ducktape (*)
- Rag clothes, tack, t-shirt or no-lint towels
- Plastic bag, mat… anything to cover
- Safety gloves, goggles, and masks.
Steps-by-steps for Painting Cabinet
Here are all the detailed instructions, please follow and customize them to fit your settings and situation. Read the material instruction as well (e.g. your paint gallon can) for drying/curing time, etc.
Before you start, making sure the working areas (i.e. where the cabinet is situated and the garage – where the doors/drawer will be) are open and ventilated. Put on your safety gloves and goggles, mask as well when sanding/painting to protect yourself from dust, particles, and chemical odor.

I. Set up Working Area & Disassembling Cabinets hardware
- Empty out the cabinets and whatever above/below them. Keep the area clean and clear to avoid dust, splatter, and any mishap.
- For each cabinet’s door, use a pointy knife to score small lines right above and below the door’s hinge. This will save you time and lots of nerve later when reinstalling doors to ensure/prevent misalignment or gap/improper closing door.
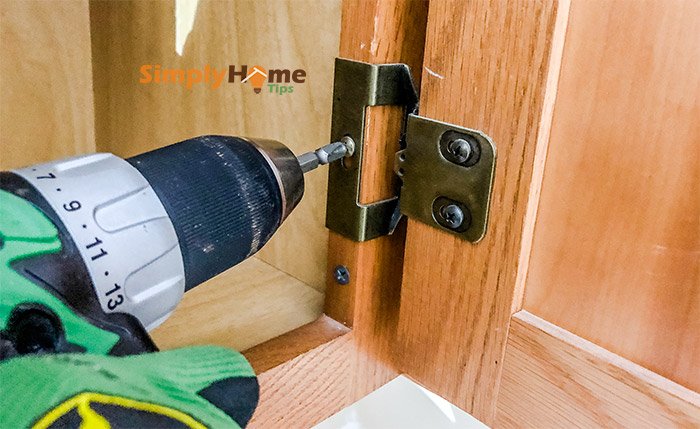
- Remove any hardware, knobs, pulls from cabinets’ doors, and drawers. Keep them along with their respective screw in a safe location if you want to reuse them again.
- Unscrew and remove doors, hinges, drawers (& their faces) from the cabinet’s box. Make sure to label each door & drawer panel individually. For example: use a permanent marker to write a small number in an area that will be hidden when finish (i.e. beneath doors’ hinges) then use a small piece of masking tape to cover that number to save it. Don’t forget to stick the matching label to the box location where the door/drawer needs to be installed back.
- Remove any electrical outlets nearby the to-be-painted cabinet. Mask the holes with tape.
- Use a vacuum to suck out any dust and dirt accumulated nearby the cabinets area as well as the working zone for the separated doors/drawers’ faces.
- Use masking tape, craft paper, plastic bags, etc. to cover and wrap any un-removable objects like the sink, faucets… For the kitchen, make sure to cover the countertop, backsplash, and neighboring sides of the ranges, hood, microwave, dishwasher, fridge…
- Setup the work area for the doors/drawer face as well (e.g. line the floor with waterproof plastic, prepare point holders), having some tripods ready to elevate these panels (for easier painting/drying the sides).
II. Clean, Sand and mask the Cabinets surfaces
At this point, depending on your cabinets’ current condition, choose one of the methods below to sand/prep cabinets’ surface. Just a reminder: make sure your working area is very well ventilated.
No-Sanding or De-glossing instruction for Cabinets Painting

- Use a scrubber pad and TSP base cleaner to clean all over the cabinets’ boxes, frames, details, and moldings… Make sure to remove all the grease.
- Similar to above, use TSP base cleaner to scrub and remove all grease and tacky stuff on cabinets’ doors and drawers’ faces.
- Equip yourself with safety gloves, mask, and goggles.
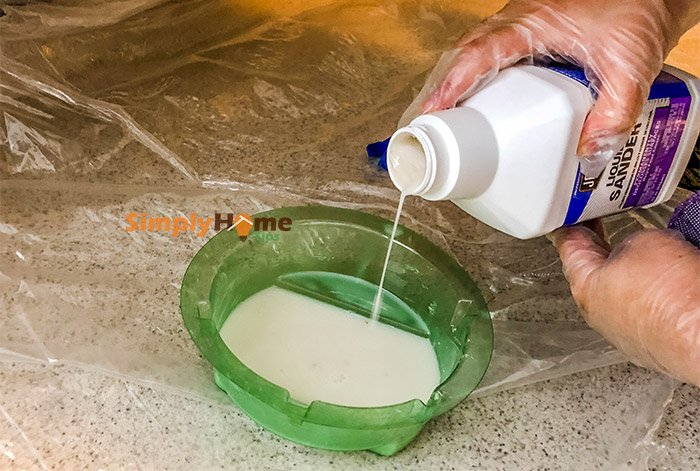
- Use a coarse cloth or scouring pad to dab/soak some generous amount of sanding/de-glossing liquid then rub in a circular motion all over the back (inside) sides of cabinets’ doors. Let them dry (wet sides up) and elevate over tripods.
- Switch over to cabinets boxes, frame, mold, etc., rub liquid sand onto these stationary parts.
- Turn back to the doors, flip them over and do the same, i.e. rub sanding /de-glossing liquid to cabinets’ doors front and drawers’ face. Don’t forget their 4 edges.
- When these are dried, there might be a little bit of a filmy/cloudy precipitate covering the will-be painted area, which is good. Do not wash or clean these off.
- Repeat step #4 to #6 to go over all the cabinets’ boxes, frames, doors, drawers’ face once more just to be sure of not missing a spot and any leftover shiny streak.
- Once done let them dry completely before proceeding. Again, do not wash or clean off any residue from this point onward.
Sanding instruction for Cabinets Painting
- Use a 120 grit sanding sponge to sang all over surfaces. Carefully use these wood sanding blocks to sand over edges and or small sandpaper for details on cabinets boxes and frames. Be patient and sand gradually, careful not to eat over all the details or round edges.
- Lightly sand cabinets’ doors and drawers’ face as well.
- Be sure to sand overall shiny areas. If any bumps were found, use a coarse 100 grit to roughly sand through them, then the 120-grits sponge to feather them in smoothly with the surrounding.
- Thoroughly vacuum away all dust and dirt from all sanding surfaces and surrounding areas.
- Use a damp paper towel or t-shirt to go through all the sanded surface to ensure no dust remain.
Stripping old paints instruction
- In case if your cabinets contained too many unknown layers of paints and you’re painting them with oil-based, then stripping would be the safest option. To strip old paints, paint the stripper solution onto your cabinets’ doors and drawers’ face. Don’t forget their sides.
- Switch and apply paint stripper solution to cabinets frames with a paintbrush.
- The paint on the doors/drawers’ face should be bubbling up by now, use, and scraper to gently scrape and remove old paint.
- Once done, turn the doors over and paint stripper solution to the other sides.
- Switch to cabinets’ frames and scrape off the old paint with a paint scraper.
- Once done, turn to remove old paint off all the doors.
- Use a very fine grit sanding paper/sponge/block to sand overall cabinets’ frames, doors, surfaces… Be careful of the details and square edges.
- Vacuum all the dust on the being-sanded surfaces and surrounding area/workplaces.
- Finally use a damp paper towel or t-shirt to go through all sanded surfaces to clear all dust remained.
Masking: Once done with all the cleaning/sanding, Use masking painter tape to go over all the perimeters surrounding the areas being painted.
Remember to mask the inside edges of cabinets’ boxes if you are not painting them. Don’t forget the ceiling if your cabinets and/or molding are high up.
You might have to double-width masking tape to ensure it is covering wide enough and preventing bleeds (extremely important for the big clumsy hands)
III. Fill cracks/holes
This part includes fixing any cracks, dents, holes…
- Go over all cabinets surfaces and look for cracks, holes, dings, and imperfection.
- Use a putty knife, scraper, credit card, etc. to work wood filler, painter putty, or spackling compound into these holes/large crack. Cover and smooth them out.
- Once dry, lightly sand to feather them into surrounding, vacuum dust, and wipe clean the sanded area.
IV. Smooth out wood grain (optional)
On many kinds of wood, extra coats of primer and colors can hide out most of the pores or uneven finish, but for woods like oak, be prepared to work the major.
So on this part, feel your hands along the wood grain and deciding for yourself. If you want the finishing surface to be as smooth as it can be, then consider working with wood grain filler or wood filler. These work right into the pores, fill them up, and prevent future diminishing.
- Apply wood grain filler or wood filler with a flexible scraper (say credit card). Try to go as thin and even into the pores as you could. For curves, edges, corners, try to rub in with a rag.
- Working small area one at a time: immediately before the second coat of filler, lightly sand with a 320-400 grit paper/sponge. Note that this sanding is very light, just to help these filler coats adhere to each other.
- Apply the second coat of grain/wood filler.
- Once dry, touch the test and feel your cabinet surfaces. Are the spores all smooth enough? If yes, lightly sand over them with a 400 grit sandpaper right before applying primer. If not, do another light sand and apply the third coat. Once this 3rd coat is dry, again, lightly sand just right before painting primer.
V. Prime and Paint the Cabinets
The priming and painting processes are pretty much in the same sequence.
- Paint the back of the doors/drawer faces with Primer/Sealer (just the surface of the backs, not the four outer sides).
- Start with the inside of any grooves or recess first (angle brush) and work along to flat areas. Make sure the paint got through to every crevice but not over-accumulating.
- For the center large area, you can use a 3-inch brush or mini-roller for faster speed.
- Let these doors/faces air-dry and elevate on tripods/painter’s pyramids spacing apart.
- Paint the cabinets’ frames with Primer/sealer:
- Use an angle brush to start from an inside trim corner, edges, decorative area, etc. Make sure to dab off any extra drip/logged crevices.
- Then use a mini-foam roller to go evenly over all other long & large areas.
- Paint the front and sides of cabinets’ doors with Primer/Sealer:
- By now, all the backs of cabinets’ doors should be dry to the touch, if not, let them dry 4 hours or per manufacture instruction.
- Carefully hold the door by its sides to lift and turn door/face over.
- Again, start with all the recess, corners, molding, trim… and work your way out. Use an angle brush to ensure it reached all the crevices without smudging or logging. Paint it thin and watch for drip. Don’t go over a single area too many times as it will leave streaks and marks.
- Use a mini foam roller to cover a large area and finish the four sides of each door/drawer face.
- Let cabinets doors and everything dry for at least 4 hours or per boxes instructions.
- When Primer/Sealer coat is dried, go back and take a look for imperfections, holes, dings, or cracks that you might have missed. If there are any, fill and fix them now with a wood sealer. Make sure to re-prime them with primer/sealer (step 6 right below) for the affected areas and feather them in with their surrounding.
- Depend on the difference and intensity of the old and new colors of the cabinet you’re going for, you might need to go for an additional coat of primer for the best coverage (e.g. going from extremely dark to light/pastel color cabinet). If so:
- use a super fine 400 grit sandpaper/sponge to lightly go over all the primed surfaces. Note that you’re not sanding the primed coat but instead remove dust, bump, drip, bubble, etc. and help the next coat to adhere better.
- use a clean tack cloth to wipe over any lingering dust particles.
- Repeat Step 1 to 4 to paint the second primer/sealer coat and let it dry.
- When all surfaces are dried and right before you’re ready to paint, use a fine 400 grit sandpaper/sponge to gently go over all the primed surfaces to remove bubbles, extra dust, and help with adhesion. Then use a tack cloth to pick up any remaining dust.
- Repeat steps 1 to 4 but this time with your 1st coat of Color paint.
- Again, when 1st color coat is dried and right before you’re ready to apply 2nd coat, use a fine 400 grit sandpaper/sponge to gently remove bubbles, extra dust, and help with adhesion. Then use a tack cloth to pick up any remaining dust.
- Repeat steps 1 to 4 for the 2nd Color coat.
- Depend on how the color coats go, you might need to lightly buff/dust-sanding/wiping and do a third coat of paint or finisher. If not, just left them dry naturally.
VI. Clean up & Put everything back together
It’s exciting with all the new paint and all, but don’t go crazy just yet. There are a few more things that need to be taken care of. Here they are:
- Remove masking tapes: With a putty knife, carefully slice and peel/slide the masking tape away. Be extremely careful to remove only the masking tape but not the paint layers. A good way to do this is when the paint is still semi-wet or dry to the touch, don’t way till they completely harden.
- Clean off bleeding/strayed paint: Have a wet/damp towel (for water-based paint) to clean any bleeding as you spot them. For oil-based paint, try to heat and blot them away.
- Re-attach doors/drawer face/hardware: The cabinets are now semi-ready for use; still, be careful as it can be dinged until all the paint layers are set & completely harden. Depending on your type/base/color of paint, humidity, temperature… the hardening process might be ranging from a couple of days to weeks. It is best to delay any drilling, hardware re-attaching, screwing, rubbing (light wipe through when needed only) until then to avoid any paint flaking or mishap.
Enjoy your “New” Cabinets! Pat yourself and take a selfie to commemorate a well-done job.
Thank you for sharing this informative article. All the information provided by you is really very helpful and important. I agreed that by using tack cloth you can keep your project dust-free and it is useful for cleaning fine dust off a surface and gives you a smooth finish. Keep posting! Keep Sharing!