Built for cutting intricate shapes into wood, jigsaws have gained the reputation for being a must have tool for woodworkers.
But making complex cuts is not the only thing that jigsaws can do. Since some of the most intricate cuts use curved shapes as their baseline, jigsaws are also used for making curves into the wood.
With that, they are also utilized to cut perfect circles into wood. While not specifically designed for that function, jigsaws could be an excellent choice for it if you know how to use them.
To help you use this multi-purpose tool in an effective manner, here are a few tips on how to use a jigsaw to cut curves and circles in wood.
Using these tips, craft your next piece of furniture and work your way through fixture installation with ease.
Using Jigsaws for Making Curves Into Wood
Jigsaws have the curves game down to the point where they are the first tool that comes to mind for this purpose. Keeping this in mind, let’s see how to make curved cuts with a jigsaw tool.
For this purpose, you will need the following:
- Jigsaw tool
- Wood cutter blade
- Pencil
- Compass
- Ruler
- For cutout shapes, you would also require a drilling machine
Preparation
Before you start making curves into the wood, make sure to know exactly what kind of shapes you want as a result. This is where you take the following factors into account.
- The measurements of your desired curve.
- The area it covers on the wood.
- The exact shape that you require as an end result.
Once you have found the answers to these questions, make sure to design your curve separately on paper. Then, you can mark the lines on the wood using your pencil, compass and ruler.
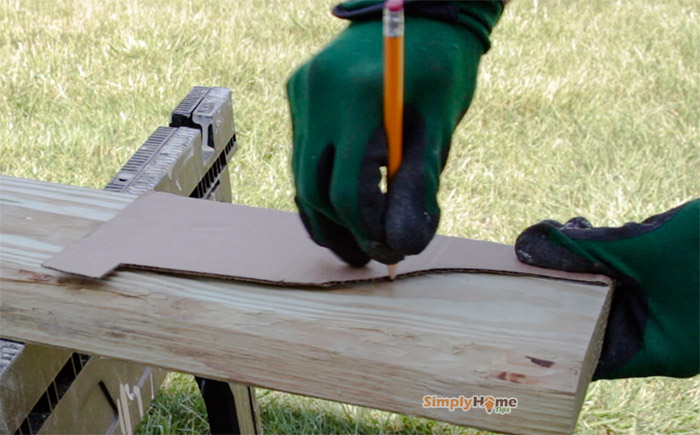
In case you are using a cutout, use your pencil to trace the required lines onto the wood surface. You may also need to drill a hole at the starting point. This would help you stay on track with your cutting, and minimize chances for errors.
Make sure that you are using the right kind of blade as well. Usually a jigsaw woodcutting blade is good for cutting woods up to a thickness of one and a half inch.
But this capacity largely depends upon the texture of the wood. Keeping this in mind, make sure to learn about the type of wood you are working with. If possible, cut a small sample first to see how your blade works against it.
Cutting
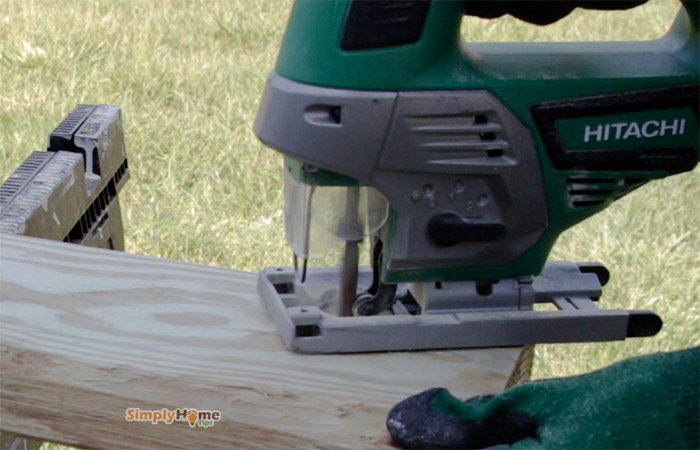
After you have completed your preparations, set your piece of project wood on the workstation. Then, perform the following steps.
- Hold your jigsaw firmly and keep an eye on it at all times.
- Set the blade at the edge of the traced line.
- Slowly start the cutting process by pressing into the wood. Have the blade cut through the wood completely before you move it further. When using a drilled hole as a guideline, insert the blade into it and guide it into a wood.
- Once the blade has sunk through the wood, move the jigsaw forward carefully.
- Make sure to adjust the angles as you move forward.
- Be wary of the lines you traced so you could cut the wood according to them.
- Adjust the position of the saw during the cutting so you have a firm hand at all times.

Once you have cut your desired curve into the wood, make sure to examine its finesse. If required, fine-tune the cut further. Afterwards, wrap sandpaper around a cylindrical shape and use it to smooth down the cut. When you are completely satisfied with it, give yourself a pat on the back, you deserve it.
Another tip to make precise cuts is by adjusting your piece of wood on rails. But that is used by only a few woodworkers.
Using Jigsaws for Making Circles Into Wood
Once you have some practice with holding jigsaws and guiding them to your desire, you may want to try using them for more adventurous cuts.
That is where circles come in.
Preparation
Typically, cutting large circles into wood is achieved by a router. Delmer tools are also used for smaller circles. But many woodworkers have started using jigsaws to cut larger circles – mostly because they are a staple tool and can be used easily.
To cut a circle into wood using a jigsaw tool, you will need the following:
- Jigsaw tool
- Wood cutter blade
- Pencil
- Compass
- Ruler
- Base board
- Nail
- Drilling machine
- Screws or double-faced tape
Here, preparation takes more time than the actual cutting does.
You will need to follow the same tracing process for marking shapes into the wood.
Make sure to draw a perfect circle into the wood using your pencil and compass, as well as a ruler for measurement.
Then, mark the very center of the circle you drew. This would come in handy later.
In this preparatory step, make use of a base board.
This base board has to be thin, no more than ¼ inch. This is so it can provide ample cutting room for your blade. Its size also has to be larger than your overall circle.
- Set down the edge of your jigsaw’s foot with this base board. It should be right along the very edge of the board.
- Once you have checked that alignment, put down a mark on the baseboard.
- Use a drill on that mark to carve a hole for your jigsaw blade.
- Fix your jigsaw to the base board by using screws or double-faced tape.
- Draw a line from the blade hole that is the same distance as your circle’s radius.
- Align this radius mark on the base board with the center of your circle on your project wood.
- Drill a hole at the very end of the radius mark on the baseboard.
- Fix the boards together with a nail so it creates a rotating device.
Cutting
Once the rotating device is made by fixing the two boards together with the nail, the cutting process becomes quite easy.
Just make sure to keep your eyes on your jigsaw, its blade, as well as the rotating boards at all times. Use ample pressure and adjust the jigsaw backwards and forwards as needed until you are sure you have cut through the wood.
Once the circle is cut out, use sandpaper wrapped around a circular object to smooth off the edges.
Practice Will Make You Perfect
As with anything, practicing these skills is the most effective way to make sure you have mastered them.
Whether it’s preparation or the actual cutting, it may take some time to get familiarized with these processes when you first start. But by performing the activities on a consistent basis, you will be able to cut down the process time by a large margin.
Leave a Reply