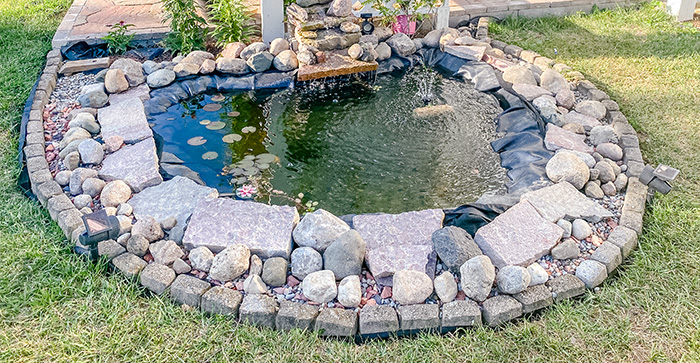
Whether you have a new home with a backyard or simply trying to revamp an older one with gardens and an empty lawn, a fish pond is always a great idea to add to the ecosystem. Building an inground fish pond is easier and more budget than you might think. The result will be amazingly cool, freshwater flowing with happy fishes swimming back and forward.

Plan and Design an inground pond
These preparation steps are vitally important to avoid any mishap or frustration during the implementation process.
Pond location
The first step is to determine where your pond will be placed within your backyard. The optimal spot would be a large enough area with full/partial sunlight in the morning and some shade in the afternoon. This is to prevent algae from overpopulating in your pond. Also, there shouldn’t be any mature tree or hard tree stumps, root, etc. to prevent punctuation to the pond liner.
There should be a GFCI outlet near the pond area for the filter pump and waterfall or pond fountain.
Also, don’t forget to call your local utility number to make sure the to-be pond area is free from any line or wiring underground.
Pond shape, size, and depth
Now plan out and calculate your pond shape and size. Will you get a preformed pond, or do you want to customize yourself? Either way, it’s better to draw out the pond shape and have a virtualized measurement before any digging. You can use anything from cheap old ropes, cords, etc. to fancy temporary marker paint to mark out your desired pond shape on the ground.
Don’t forget to measure and record down your supposed pond dimension. You will need these numbers when selecting components such as pump, liner, etc. For an inground pond, if you plan to have fishes and plants, plan for a minimum 7ft x 4 ft. To be honest, a pond can never be too large really, as fishes will need space to grow and be healthy.
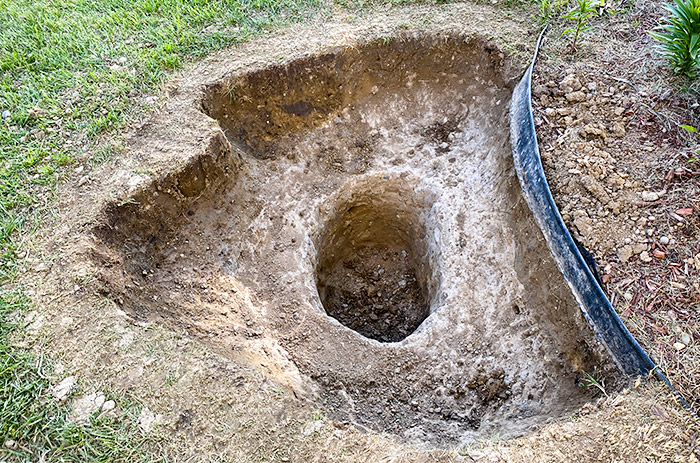
An important note is on the depth of the pond. In general, the pond should be at least 2 ft deep for small fishes like goldfish, minnow, shubunkins, etc. For koi and other larger fish, add 1-2 feet to the dept. If you live in a winterized area, dig an extra 1 feet hole in the center to help the fish survive during frosty.
What do you need for an inground fish pond or components of a pond
So once you have your pond sketched out, it’s time to shop around for all the necessary components. Remember that every feature you’re adding to the pond should be planned now and ready ahead of time to make the overall system work flawlessly.
Pond liner
The pond liner is the foundation of any beautiful and active fish pond. It is important to keep your water mud-free and clear that you should attribute most of your budget to getting the highest quality pond liner. As time went by, you can fix most things that went wrong, but if a pond liner is cracked or leaking, it will be immense troubles to empty the ponds, contain your fishes and find the damaged spot will take lots of time, luck, and sanity.
It is recommended to get the 45mm EPDM pond liner, as this material is more heavy-duty against UV light, punctuation, and other mishaps. There are lightweight PVC pond liners as well if you want a small pond in the back yard.
Whichever pond liner you are going with, make sure it is large enough to cover the pond, its depth, and an extra 1 feet out from the pond’s perimeter. Also making sure that the pond liner’s material is safe for fish and live stocks.
Pond underlayment
Pond underlayment exists to protect the pond liner from getting cracked or punctuated by tree’s root, sharp rocks, and other objects. There are many routes to going about this. You can buy the pond underlayment from pond suppliers; these are usually strong, flexible, and really easy to work with.
You can use a piece of scrap carpet as the underlayment beneath the pond liner for a more budget option.
Pond skimmer
Every pond requires maintenance at some points, on a daily, weekly, monthly, or seasonal basis. One of the common issues is floating debris, leaves, or things that make your pond looks less “clean”. A pond skimmer exists to help with that problem.
Basically, a pond skimmer is installed at the time of constructing the inground pond. It has a submersible pump inside to help draw surface water into the skimmer and trap floating objects in the inside basket. So now, you will have to clean the pond skimmer every once in a while instead of the daily skimming over the whole pond if your fish pond is large.
PVC flex pipe
You will need some pipe to route the water from pumps to your water fixtures. Choose PVC flex pipes for ease of routing and long-lasting capability.
Submersible Water pump
A submersible water pump can be placed inside your pond skimmer to attracting floating objects or at the deepest spot of your pond to help sucked up water along with sinking debris, sludge, and waste materials.
Depending on your pond’s size, you might have to clean the pump’s filter regularly. Pumps’ filters are often harder to clean cause you have to open the pump and carefully take off the filter to clean. That’s why it is recommended to attach a pre-filter to trap larger debris, sludge, and fishes waste. Most pre-filters are easy to clean with a simple wash-off from a hose sprayer.
For the skimmer option, you will need a submersible pump beforehand to install at the time of construction; on the other hand, it can be purchased and added later for waste and solid purposes.
To purchase the right pump for your pond, look for those that match your pond size. Although you might have to go up a few notches, depending on how many things connect into the path way between your pump to your water fixtures, diverting elements, etc.
Pond Filters
Several kinds of filters go with your pond, like the pre-filter, pressurized filter, UV filter, etc.
The idea is to keep your water as clean and clear as possible for your fishes to be healthy and for your enjoyment. Some filters work better and less on maintenance; yes, each additional filter you put in service will require some maintenance.
A pre-filter works as a solid and waste contraption and keep them from blocking your submersible pump. For smaller particles, a pressurized filter is needed. A pressurized filter usually has a built-in backwash to help you maintain its hygiene through a few pumps on the handle.
Ionizer
A pond ionizer releases copper ion through its probe into the water to help kill string algae. Your water will get clearer and look much nicer as a result.
Typically, an ionizer’s anode will need to be replaced every year to keep the consistency operation. You also need to test the water on copper concentration to ensure the fish be no harm. For more details on how an ionizer work with your water level of harness, try the pond talk guide.
Aerator
An aerator help generating oxygen for your pond to keep the fishes alive. Typically the deepest part of your pond will have less oxygen and tend to lose them more during the night or cold winter month. Hence, every livestock pond should equip one of these.
Pond De-icer or Heater
For fish pond in the cold winter area, a pond deicer or heater helps keep the pond from frozen entirely and prevent winter-kill on the fishes. Typically fishes can hibernate at the deepest area of your pond and survive if the entire surface is not frozen.
The deicer is typically around 300W so that it can be turned on throughout the winter season. For better temperature control, look for those with a built-in thermostat and is safe for your pond liner.
Once you have gathered everything need, check the weather and pick a good day or days to carry out all the manual labor.
Step-by-step guide on building an inground fish pond
1. Prep work and Outline the pond
As mention above, take the first step to plan out and buy everything you will need. Don’t forget to call the digging number and utility companies to ensure your designated pond area is free of lines, pipe, and any other underground work. Make a blueprint of where to place permanent components like skimmer, waterfall, drainway, etc.
Also, use marker paint, long ropes, or string to mark the pond shape on the ground at the site.
What’ll you need: marker paint, ropes or anything to mark place to dig.
2. Dig the pond, holes, shelf, etc.
On a good sunny day or days, dig your marked area. If it’s filled with grass, might need to pull them up. If your soil is sticking to the shovel, use a hose to spray some water, and it will fall right off.

Start by digging the whole marked area down to 1 foot deep. Then go inward by 1 foot by the perimeter and dig deeper down. That way, when you finished, the pond will look like a stair down with benches and shelves for plants and ease of access.
Also, don’t forget to contain the digging up soil and send that to landfill or putting up for curb pickup.
What’ll you need: shovel, water hose, axe, utility gloves, soil container…
3. Install stationary components: skimmer, drainer, ducts, waterfall…
This is an optional step where your pond is large, and you want to install fixed components such as a pond skimmer, a drainer underneath the pond, fill-back water ducts, or pipes for the waterfall… Depend on the feature you want, situate your parts in the designated area, level them well, and follow manufactural instructions.
4. Prepping the foundation: sand fill and pond underlayment
The pond foundation will not look smooth and safe for your pond liner to go directly on; thus, it needs to be carefully prime and all. Ensure the pond’s shoreline is leveled on all sides; if not, use the digging-up soil to make a bank.
If you reach any larger rock or a sharp object, make sure to remove them. If there are lots of pebbles and small stones underneath, you can buy some builder sand and level it on the pond bottom to about a 3-inch layer.
Still, lay a piece of pond underlayment or a throwaway carpet to protect your pond liner. Do this to prevent any leaking and unnecessary stress on the liner.
What’ll you need: pond underlayment or carpet, builder sand
4. Install pond liner
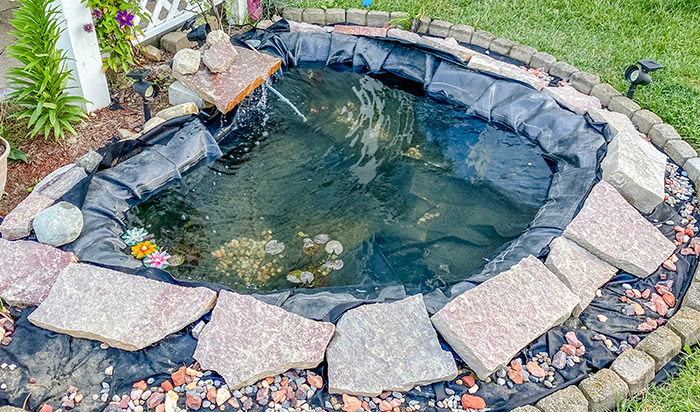
Your pond liner has to cover every inch of your pond plus an extra of 1 foot around the pond’s perimeter. You may need a helping hand to situate the pond liner, folding overlap, shifting corner, etc. It also helps if you fill the pond 1/3 or half-way to make sure the liner is pulled down to the bottom.
Also, ensure you pond liner is cover and overlap skimmer, drainer, waterfall’s bottom surface if you installed any of those.
When the liner is settled, cut off extra corner with utility knife or scissor.
What’ll you need: pond liner, water hose, utility knife
5. Rocks, stones, and pebbles in
Now it’s the fun of decorating and situating all the rocks, stones, and pebbles. Start from the larger blocks to go around the pond perimeter, secure the pond liner extra gap, fill in with smaller rocks and stones, and finally layered with pebbles.
Do the same for decorating your waterfall as well. You might have to seal them with foam sealant to prevent the backflow of water or leaking.
What’ll you need: rocks, stones, pebbles, pond foam sealer.
6. Instal water treatments: filters, aerator, UV filter, ionier…
To help your fishes survive and grow healthy, you have to make sure that water is clean, have enough oxygen, and also at the right temperature.
To keep the water clean and clear, you will need filters. Sediment or solid pre-filter at the bottom of your pond will help keep the pump’s long-life and the pond from too much waste. If your pond is nearby a tree with lots of leaves and other particles, then a pressurize filter might be necessary as well to suck up all sludge and smaller objects.
Adding an aerator will help supply your pond with enough oxygen throughout the night and cold winter at the minimum of power cost.
For a pond in a hardy cold area, a deicer or heater might need to prevent complete frozen and thus winterkill on the fishes.
Hook up an ionizer or UV filter will help ponds with algae and green color water problems tremendously, but you must configure and adjust the copper ion level being used.
7. Fill the pond
Now that your pond is fully built and everything is set up, it’s time to fill it with water. You have 2 options, to fill with city water or natural water from rain or well. For the first, you might have to dechlorinate the water either by adding retail dechlorinator or fill up and let your pond water sitting still a day or two.

If you have a well with natural water or your area has lots of rain, you can fill up and use this water immediately without chlorinating treatment. Have a pipe connect temporarily to your gutter on a larger pond would save a lot on the water consumption budget.
Either way, when your pond is filled with water, you still need to let it rest some time to settle the water temperature.
8. Add inhabitants: fishes, plants, and other fixtures
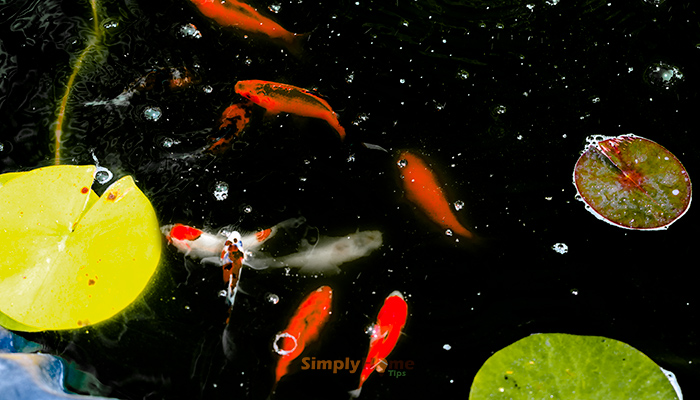
Finally, after the water temperature is right, it’s time to add fishes, plants, and other fixtures. Search for species that could live well in your area. Don’t overfeed them and have some plants to give your pond the sight, shades, and beauty.

Most water plants can grow very well on the shallower bench you created earlier; make sure the water temperature matches their prior habitat.
Keep your fishes healthy and plants happy with a clean pond, and enjoy your creation for years to come.
Leave a Reply